 No one likes drilling holes into brand new race skis. But, like waxing skis and gluing pole tips, mounting bindings is part of being a cross-country skier. The good news is, if you learn to do it yourself, you don't have to be at the mercy of your male teammates. The very wise Maria Stuber originally proved to me that women can do this, and then I got a refresher course from Lucas Schulz, whose sister Anna CAN CHANGE HER OWN BRAKE PADS. Here is a D.I.Y guide to mounting bindings.
Plan B: Unless you are a true handywoman like my teammate, Susan "all-I-want-for-Christmas-is-a-Dremel" Dunklee, you will probably still need to locate a man, in order to borrow some of his tools. Here's what you'll need:
- a sharpie
- a phillips-head screwdriver
- wood glue
- a ski scraper
- a drill
- a phillips-head drill bit
- a limited-depth drill bit that may actually be called a "binding drill bit." I suggest using the smallest one you can find. I used approximately a 3.6mm (diameter of hole) x 9mm (depth of hole) bit, which is the larger bit pictured below.
- the brand-specific jig

 |
| THE JIG |
 The most important thing is the jig. You can find this online (to buy) or from your local ski shop or brand rep (to borrow). It makes the process relatively idiot-proof. You snap it onto your ski and then drill through the holes in the jig. The holes line up exactly where your binding screws go.
 And of course you'll need bindings! These are my new Salomon Pilot skate bindings. They come with three screws for the front, plus two along the foot plate.
The Drill.
Nothing makes you feel like a bigger idiot than when you can't get the bit in or out of the drill, so I have explained that below.
Nothing makes you feel like a bigger idiot than when you can't get the bit in or out of the drill, so I have explained that below.
 |
| The round end of the bit goes into the drill. |
 |
| The three teeth on the inside of the drill close in on the bit to hold it in place. |
 |
| Turn the two halves of the barrel of the drill in opposite directions to get the teeth to close in. Reverse directions and they will spread out. |
 |
| To secure the bit in the drill, twist in opposite directions as tight as you can. |
 |
| Push the button here pictured next to my thumb to change the direction of the spinning bit. You want it to spin clockwise for our purposes. |
OKAY, LET'S GET TO WORK!

2. Clamp the jig onto the ski. The blue handles pivot to clamp or unclamp. You can do this on the floor (left), or if the bottom of the jig goes below the bottom of the ski, you may need to set it on a bench (right).

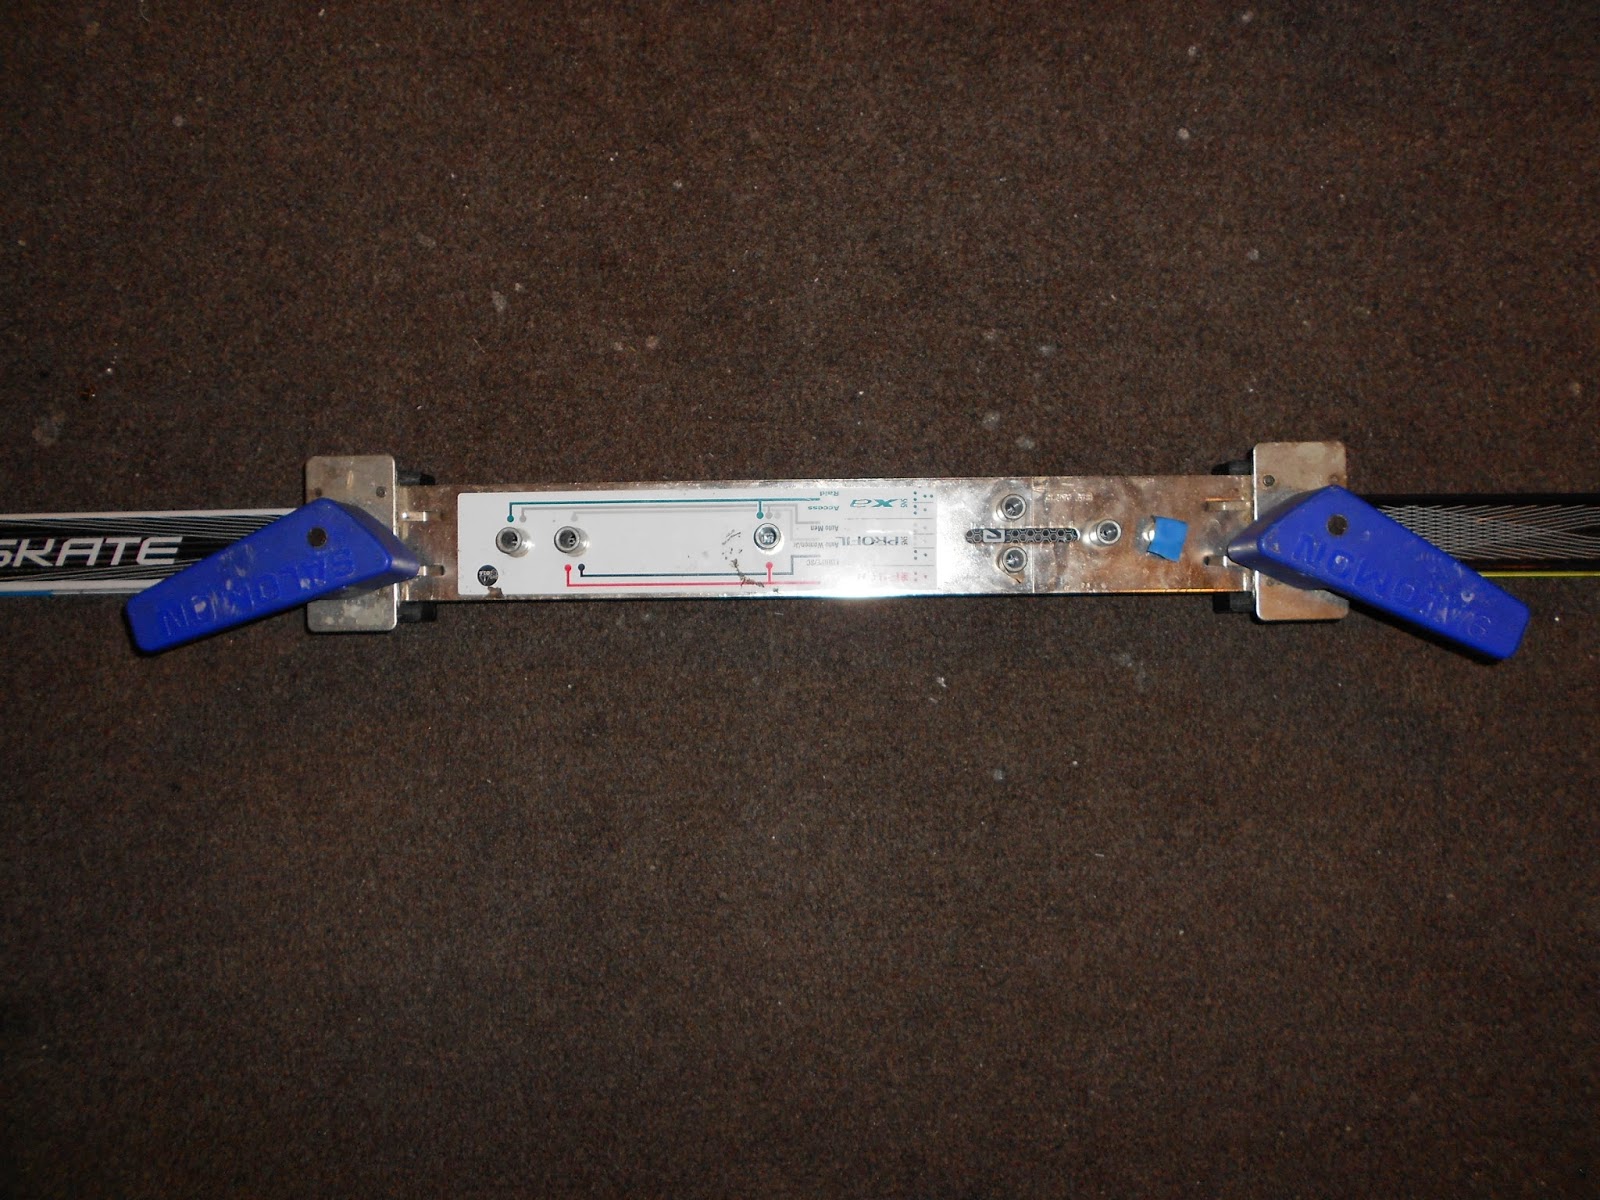
3. Find the line that marks the balance point on the jig, and line it up with the balance point of the ski (left). Push the jig all the way down until it touches the ski (right).


***This is when you stop and check to make sure the jig is facing the right way***
The three triangle holes (below) should point towards the front of the ski.

***This is when you check everything thrice***
I) the balance point of the jig is lined up with the balance point of the ski
II) the jig is pushed all the way down onto the ski
III) the jig is pointing the right way
4. Drilling time! The idea is just to get the holes started so you can put the screws in, so the holes don't have to be very big at all. If you hold the bit up next to the ski, you should see that it would only go a little ways into the ski.
Hint: Some jigs have holes for multiple types of bindings, so make sure to drill only into the holes that are labeled with your specific binding type. P.S. It doesn't hurt to hold your binding up to the jig to make sure you've got the right jig.
 |
| Fresh holes. |
(The fact that there are no pictures of me confidently and competently drilling into my skis is further evidence that I did this by myself!)
 5. Apply a drop of wood glue to each hole.
6. With the screws in the binding, line up the screws with the holes, and get the screws started with a screw driver.


7. You can actually screw them all the way in with a screwdriver if you prefer, but it is pretty hard work and takes a long time, so I recommend using a drill. So swap out your binding drill bit for the phillips-head bit.

Pull the trigger slowly and push down hard on the screw with the drill, doing your best to keep the drill vertical. Try to stop the drill right before the screws are all the way in, and then finish them by hand with the screwdriver. This is mostly because the drill makes an awful noise when it gets the screw all the way in. Do the front three screws first, rotating between them so that they are all screwed in at about the same time, i.e. do not screw one screw in to completion before starting the next. Then do the foot plate screws afterwards.

8. You are almost there. Once the binding is secure, with all the screws finished by hand to ensure their tightness, you place this little screw cover over the rear-most screw.

9. Last step is to apply the decal to the front of the binding.

and VOILA!

And remember: just because you don't have to be at the mercy of your male teammates, doesn't mean you have to not be at the mercy of your male teammates. Modern feminism is all about being empowered to choose when you are ready to drill, and when you'd rather stick to the baked goods. The choice is now yours! Next lesson: gun cleaning!
No comments:
Post a Comment